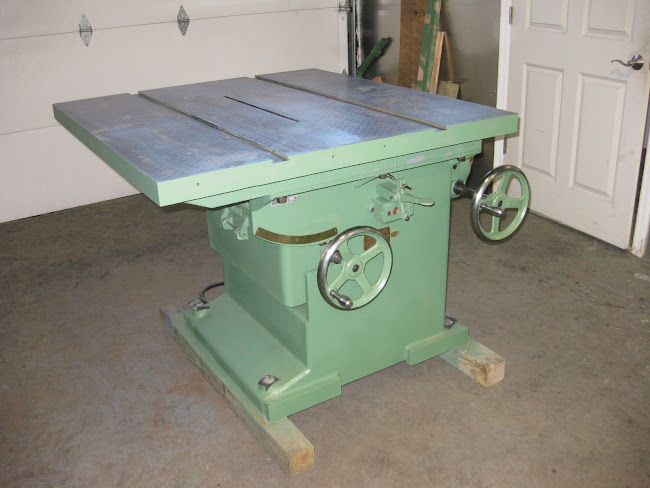
Pete, good observation about the color. I am partial to green: the old Powermatic, Oliver and Northfield. I thought that the color that came with the saw suited it. I had some paint samples from a Northfield table saw I had restored and had a gallon made up. The two turned out to be almost identical, and what you see in the pictures is pretty close to real life.
I am on the fence about keeping the saw or selling it. My furniture making business has really taken a hit over the last two years, and I have been supplementing my income by restoring machinery and selling it. That being said, you get up close and personal to a machine when you restore it, and the Tannewitz is probably the best I have come across. So it will be a tough decision for me to make.
As far as lubrication of the gears, all I have done is put oil in the required ports, and a few drops on the gears. I try to be as sparse with the oil as possible to avoid gumming up everything with the sawdust. However, it sounds like you may be on to something with the graphite. Would you recommend using it over light oil?
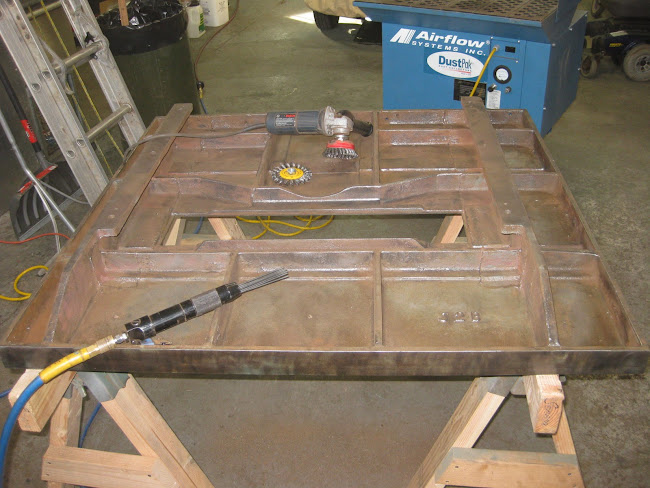
When I got the table on some sturdy saw horses, I realized that I had my work cut out for me to clean the underside. Sixty years of crud, saw dust and old primer were the norm. There was not a square inch that did not need attention. The design of the table with all the ribs for strength and stability is tribute to Tannewitz engineering, but made cleaning all the more time consuming. I decided to use a needle scaler to go after the worst areas, and then a right angle grinder with a cup and circular brush on the less cruddy spots. However, because of the interferences from the ribs, I found it went faster to use the needle scaler on all the surfaces, as it is very good at getting into corners and small areas. After I finished with the needle scaler, I went over the surfaces that I could reach with the wire brushes. All told, cleaning the underside of both tables took about four hours.
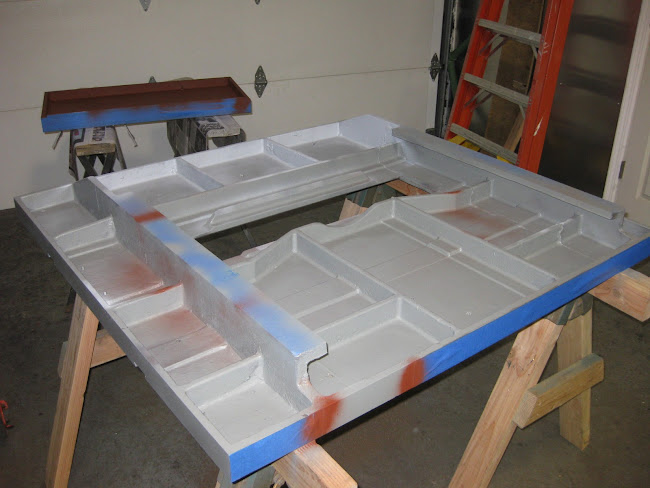
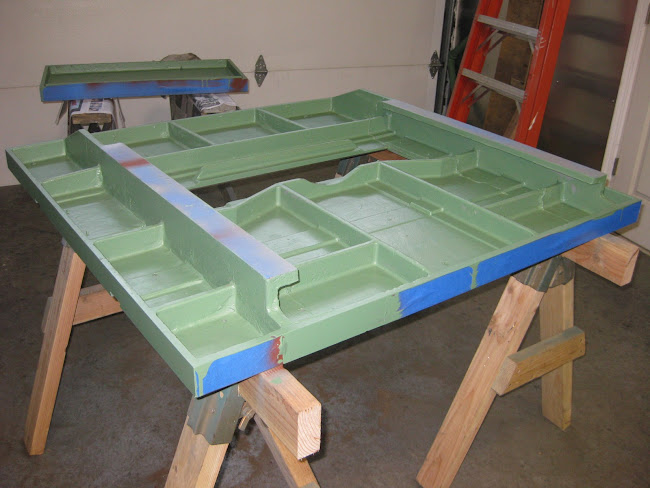
Next came the priming which I did with some leftover rattle cans of primer. I ran out of grey and had to use some rust colored paint I had in another can to finish the work. I applied the top coat using brushes as the aesthetics for the underside is not important, and I also did not want to have to deal with the preparation and cleanup required for spraying.
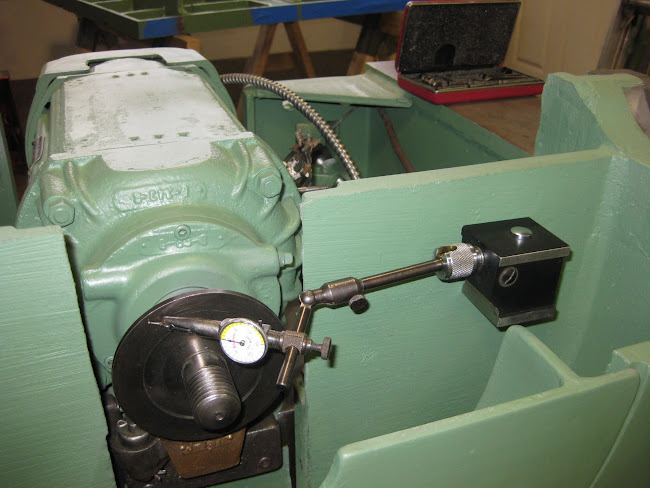
I decided to take a look at the run out on the arbor. I had already checked it out when I bench checked the motor, but wanted the added assurance that nothing had changed. I also used a different dial indicator. I was happy to see that the run out came out to .0005, which was the same as I saw on the bench.
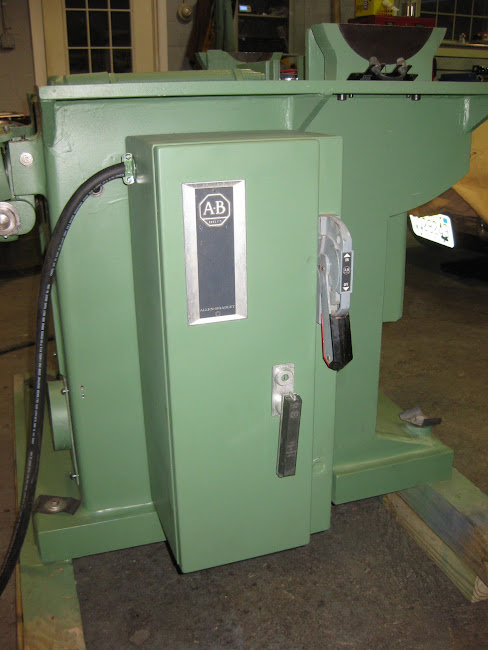
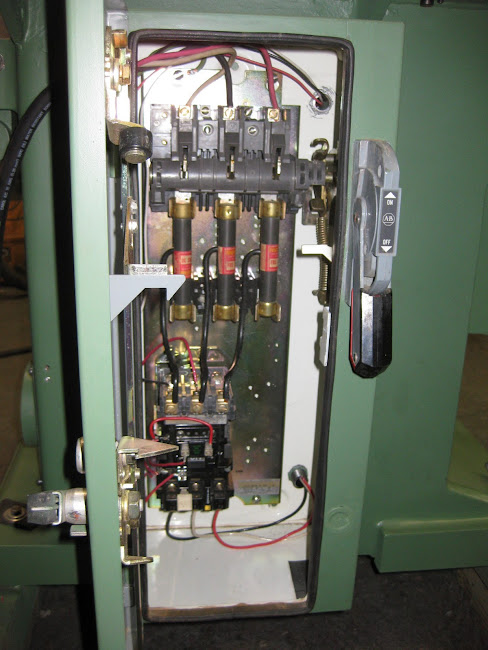
The starter that came with the saw worked, but was very old and tired. The start/stop switch also needed replacing. I kept my eye out on ebay for a starter and switch that were reasonably priced and in good condition. I was able to buy a new Cutler Hammer switch that matched the old switch and fit nicely onto the mounting plate for the brake cable. I also got an Allen Bradley starter and enclosure that were in very good condition. The enclosure was larger than I had expected. However, I like to have a disconnect with the starter, and when you combine this with fuses and a large starter to handle the 7-1/2 hp motor, real estate needed for the enclosure grows. I had to drill and tap holes for the mounting screws and two larger holes for the connectors for the armored cable that went to the motor and start/stop switch. Drilling and tapping those holes was literally a real pain, as I only have hand held electric drill that wanted to tear my hands off when each drill bit broke through the ½” plate. I finally rigged up a wooden cradle that took some of the burden away. I had to use 5 drill bits on each hole to get to the bit required for tapping pipe threads for the connectors. Pete, I would love to have had access to that monster magnetic drill you used on your saw!
When I got the starter, many of the wires had been cut, and I was not sure how to rewire it. I posted a request for help on OWWM and got a lot of assistance. I was also told that the 120 V coil on the starter was the wrong size. I either needed to replace the 120 V coil with a 240 V coil, or use a step down transformer. An OWWM member was nice enough to send me a transformer gratis. However, the enclosure did not have room to accommodate it, and for aesthetic reasons, I did not want to mount it outside the enclosure. I was able to find a 240 V coil on ebay it and replaced the 120 V coil. I will return the transformer to the OWWM member.
After I had it all wired up, the moment of truth came when I pushed the start button. I was relieved when motor came on and ran quite. However, when I hit the stop button, nothing happened. I pulled the disconnect switch and went to the schematic. I noticed that I had wired the switch wrong, and reversed two wires which solved the problem.
The table went on without a hitch. It helped to have a couple friends to align the table while I maneuvered the shop crane. The six bolts that attach the table to the frame went in with a little help from a rubber mallet to tap the top a fraction of an inch into position. I kept the bolts loose until I could drive the taper pins home, then tightened up the bolts.

