Oliver 25A lathe

techniques and projects: share and learn

Moderator: nektai

Post Reply
crzypete
Posts: 1691
Joined: Thu Dec 16, 2004 10:45 am
Location: New York State
Contact:

Oliver 25A lathe

Post by crzypete »

Well, I've had this lathe kicking about for at least a dozen years, perhaps even more. When I first got it, I was in need of its services, so I cleaned the working surfaces and put it right to work. Somewhere along the way I took the time to paint the carriage and tailstock. Then, my work changed, I no longer needed it and I ended up moth balling it in pieces around 7 years ago. It has sat in various places in my studio since I moved in. Before coming to my new studio, it was in a storage unit for a year, where all the original clean up turned back into rust. I should have greased it! Well, here I am present day, I have another project for it and it is time to bring it back from the dead.

For those not familiar with the Oliver 25A, it is a patternmakers lathe with a integral motor headstock that has four speeds. The A signifies that it swings 16", a B swings 20" and a C 24". My lathe turns 60" between centers.

The first part I tackled was the foot that goes under the headstock. This was similar in shape to my oliver 399 planer. Here is the before picture. Four layers of paint there.
Image

I ended up sawzalling off the door. The hinge was pretty rusted and I can easily rebuild it as it is just a straight pin. Here it is stripped. My technique was a hooked paint scraper that I would frequently sharpen on a belt sander. I followed that with a knotted wire wheel on an angle grinder.
Image

From the other side, going to need a bit of bondo!
Image

And quickly bondoed up, wow that looks pink in the photo!
Image

From the front
Image
Last edited by crzypete on Wed Apr 03, 2013 11:01 pm, edited 1 time in total.
crzypete
Posts: 1691
Joined: Thu Dec 16, 2004 10:45 am
Location: New York State
Contact:

Post by crzypete »

Meanwhile, I kept staring at this crate on my pallet rack. My very own time capsule. I had put all the accessories to the lathe in there in 2006 and sealed it up. I know I opened it once after it was in my storage unit and was disappointed by the rust. I re-sealed it and let it sit ever since.
Image

Over on the leg, the first coat of bondo has been sanded and I am adding more.
Image

Kinda amazing how rough these castings always are. I have learned to be heavy handed with the bondo, but when in doubt, leave voids, It is easier to fill then sand.
Image

Shoved under the tablesaw island on a custom built skid was the headstock. This thing is a beast. Really big and really heavy. And in its present condition, really ugly! That knob on the brake was a mirror polish knob that I bought from McMaster when it was stored.
Image
Last edited by crzypete on Wed Apr 03, 2013 11:05 pm, edited 2 times in total.
crzypete
Posts: 1691
Joined: Thu Dec 16, 2004 10:45 am
Location: New York State
Contact:

Post by crzypete »

Time to pull that crate off the rack and check out its contents
Image

I was lucky that when I bought the lathe, it came fully tooled. This is especially lucky as the faceplates and rests for these machines are hard to come by and when they do appear, they fetch real money. Upon opening the crate, I find rust, but it is certainly less than the pieces that were fully exposed. The crate has helped.
Image

I start scraping the paint on the headstock.
Image

Up against the back wall of the shop I had stashed the bed. This is the location that it will be set-up, but there needs to be some rearranging first. Here I have it pulled out and on a dolly. It's close to 9' long. Kinda crazy that this thing can only do 60" between centers! ON EDIT, Ok, my memory fails me and a tape measure is truth, the bed is only 8' long which makes more sense.
Image
Last edited by crzypete on Sat Apr 06, 2013 10:42 pm, edited 1 time in total.
crzypete
Posts: 1691
Joined: Thu Dec 16, 2004 10:45 am
Location: New York State
Contact:

Post by crzypete »

The headstock is quickly stripped and is looking better already. I also removed the brake lever to gain better access to painting that area. I pulled out my manual for a second with grand visions of pulling the spindle in the name of better paint, but got talked out of it and it is definitely for the better. Need to get this thing done. According to the manual, there are tapered roller bearings in there. This thing was built like a tank!
Image

Also stripped was the tailstock leg and behind that, the cover for the back of the headstock. The cover hides some of the electric mumbo jumbo that goes on to allow using all four sets of motor windings.
Image

I begin bondoing the head. This is applied quite thickly!
Image

And a blurry shot of the other pieces as they get lighter coats.
Image
crzypete
Posts: 1691
Joined: Thu Dec 16, 2004 10:45 am
Location: New York State
Contact:

Post by crzypete »

This takes us up to today. I pulled out a special work holding fixture to help position the bed for easy stripping.
Image

It was a dirty job, but the bed got stripped. This thing is super rough. Gong to need major amounts of bondo. I am debating and leaning towards leaving the back unbondoed. It goes against a a wall and I really need to have limits.
Image

Meanwhile, I sanded the headstock and applied a second coat of bondo. The fillets are filled with the glazing compound that I normally touch up the bondo with. It is much softer and easier to sand. Should be fine inside those fillets and will save lots of work. Plus, it spreads smoother so it should work quite well
Image

And here is the last photo from today. The bed took massive amounts of bondo and I am sure will need even more. Hopefully I laid it in a relatively smooth application as I am not sure how well my 6" DA sander will fit in the skinny section. Lots of nasty sanding ahead.
Image
DenaliPilot
Posts: 63
Joined: Thu May 17, 2007 8:22 am
Location: Denali, Alaska

Post by DenaliPilot »

I'm enjoying this project report, Pete. Following this makes me appreciate all the other restored and rehabilitated machines in your shop.
-DP
chathamworkshop

Post by chathamworkshop »

Great project Pete. Looking forward to reading about the rebuild. I like your "work holding fixture". I have not seen it in other photos. Is that a new addition to your place?

Bill
crzypete
Posts: 1691
Joined: Thu Dec 16, 2004 10:45 am
Location: New York State
Contact:

Post by crzypete »

Hey guys, Nice to hear from both of you. Glad that the forum is still checked, no matter how much I try to ignore it!

DP, this is certainly an intensive rebuild, at least one that is requiring an absurd amount of bondo. Really it is a painting project as much as anything, as much of the rebuilding and modifying that I like to do has already been done. I'll highlight these in future posts as I actually get the thing back together.

Bill, Indeed that is a new addition to the fleet. I bought it last summer. A Kubota L3710. Great machine. 37 Hp 4x4. The PO changed over the bucket mounting system to the standard skidsteer quick mount. That made it I easy to add forks and I also modified a snow plow that power angles to clear the driveway this winter. Really a great purchase that has already changed how I work and it has been less than a year of owning it.

Here's a deceiving view- I think it looks even bigger in person.
Image


Back to the lathe. All this stupid bondo in tight places is really a pain. Lots of sanding. I could just sand for days on end. Got the second coat on the bed. It is getting closer, but it is using a whole lot of filler. Here's a close-up.
Image

And a close up of the headstock. This is pretty much ready for glazing compound. I added a bit more bondo on the face of the stripes on the front. Hopefully it will not be a sanding disaster. I am definitely tiring of sanding bondo.
Image
Last edited by crzypete on Fri Apr 05, 2013 8:55 am, edited 1 time in total.
chathamworkshop

Post by chathamworkshop »

I hear you about the pain of sanding bondo. I am thinking of trying something else the next time I have a project. I am sure you have been able to get your moneys worth out of the Kubota in and out of the shop and it is a blast to operate.
I was wondering if you can share what sort of project you are doing that requires a pattern makers lathe, and after all this work, will it become a permanent part of your shop.
Bill
crzypete
Posts: 1691
Joined: Thu Dec 16, 2004 10:45 am
Location: New York State
Contact:

Post by crzypete »

Bill, I used the napa product Cuz on some older projects and I seem to remember it sanding better, less gummy. I am not sure why I switched to bondo brand bondo. I was using a chisel today and it pares very nicely, saved me some sanding labor.

I don't actually need a patternmakers lathe, but it is what I have. The outboard faceplate on this thing is 24" in diameter and That allows some awesome turnings. I am experimenting with some new pieces, A potential stool seat and Perhaps some metal spinning for an un-related project are my first orders of business. And yes, it will stay set-up once I finish it. Should be too nice to put away! I don;t like to put this kinda effort into machines to flip, I would just lose money.

Aside from sanding way too much bondo today I pulled the last piece of the lathe to be stripped. The outboard tool rest is definitely an oliver original, but it is of a less common style that the one I have typically seen. Perhaps its slightly lighter design was meant only for the 16" swing lathe that I have. Here it is half stripped with my cheap paint scraper.
Image

And fully scraped.
Image

Meanwhile, the bed is getting closer. This really was one of the cruder castings I have encountered and it has just taken an obscene amount of filling and sanding. I have circled the areas that need more bondo with a sharpie and am about to add even more. Still debating the back of this thing. I am hopeful that this is the last coat for the front.
Image

So I finished stripping the outboard toolrest and hopefully that is my last thing to strip as my wire wheel is now officially toast. This was a mostly new knotted wire wheel at the start of the project.
Image

Here it is all stripped. The casting is pretty decent and I will not be adding the pink demon to this piece!
Image
crzypete
Posts: 1691
Joined: Thu Dec 16, 2004 10:45 am
Location: New York State
Contact:

Post by crzypete »

This thread is beginning to get monotonous. What time is it? filler time.

Fortunately, the end is near. Here I am spot filling with gray stuff. There are three spots that got a bit more bondo too, but that is it for bondo and filler on the front of the bed.
Image

That leads me to the back, where I really tried to resist. The four coats that filled the front were not going to be replicated here, I decided to plug the drilled and tapped holes in the back and fill one coat near the headstock. I had some extra which I lightly spread past, but ignored my twitchy eye to put it on thickly.
Image

Here you can see the filled holes and other left alone section. I feel fine about this.
Image

I believe this ends my filling and I am gearing up for some serious painting. I am kinda eager to see how the whole thing actually looks. What normally happens is after I paint it, I only see the little spots where I could have done better. But eventually that fades and I can enjoy the effort I put in to get the rest of it looking nice. I could really get it perfect if I would use a sandable primer before the paint, but it is just a machine and really doesn't need that (although I did that on my tannewitz bandsaw, back in the days when I had more time). In any event, I can't wait to take the next step.

On an amazing note, with all the bondo I used on this lathe, and the lesser amount that covered my Tannewitz table saw, I still have a good 1.5" worth in the bottom of my gallon.
crzypete
Posts: 1691
Joined: Thu Dec 16, 2004 10:45 am
Location: New York State
Contact:

Post by crzypete »

Wasting no time, today was the day. A nice clear spring day with lesser weather predicted for later in the week. There was no turning back.

I decided to spray outside as this would have been awkward in my spray room. First step was masking all the machined components. I put the bed up on sawhorses and used green tape to mask.
Image

I covered the slab with black plastic and pulled all the other elements out.
Image

Then I was fast and furious into the paint. I sprayed Rustoleum that I thinned with acetone. I would have used the sherwin williams paint that I used on the tannewitz had I not started painting the lathe years ago with Rustoleum. Here is the upside-down bed and the front with the deluxe bondo treatment
Image

For comparison, here is the back that had virtually no bondo. No regrets, this project had to end sometime, but man that is a rough casting. Truthfully, it looked less intense once it was out of the bright sun, this is as bad as it gets!
Image

The headstock
Image

Paint everywhere. I sprayed the outboard stand laying down to get the underside. I stood it up afterwards and finished it off. It looks a bit rough as well, but nothing like the back of the lathe. Forwards!
Image

Inside for the night. Patience is a virtue. I need to wait before assembling. I need to wait before assembling. I need to wait.....
Image

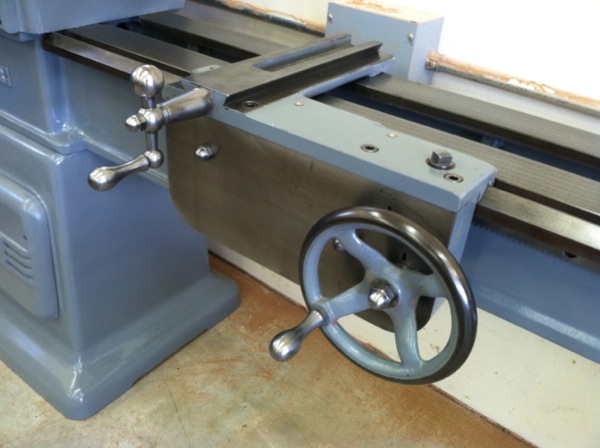
Here's the bed. I have already stripped some of the tape. I used bolts in the attachment holes as handles to guide the dolly into and around the studio.
Image

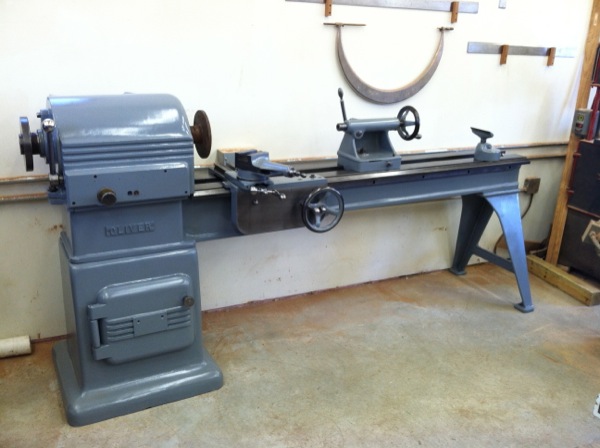
That's it for today. I am relieved to be done with the painting parts of this. I'm definitely excited to have my lathe back. It has been so long. I was thinking that the purchase of this machine probably predates my digital life. I am not sure I owned a digital camera back then. I am really going to have to dig to find a proper before picture.
crzypete
Posts: 1691
Joined: Thu Dec 16, 2004 10:45 am
Location: New York State
Contact:

Post by crzypete »

Wow, ancient history here, but I actually found some before pictures. The first two are from the dealer who sold it to me. There is a green Delta 17" drill press in the foreground of the first shot that I am pretty sure I bought as well.
Image

The condition actually looks alright in these photos.
Image

And here it is moved into my old studio. This must be just when I bought it as it looks like I am cleaning it. Hard to believe it will be standing again shortly.
Image
chathamworkshop

Post by chathamworkshop »

Wow! Nice job on the paint. This project is going quickly. I can't wait to see it fully assembled.

Bill
crzypete
Posts: 1691
Joined: Thu Dec 16, 2004 10:45 am
Location: New York State
Contact:

Post by crzypete »

Thanks Bill, The paint is actually kind of mediocre by my standards. The last coat may have been mixed a bit thick and wasn't spraying that well. But at the end of the day I move on and put this thing together. I don't want to waste too much time on this project.

Yesterday was all that I could wait on letting the paint harden and I went in on putting it together. This thing is huge! I am already rethinking how it will exist in my shop. My crown lift is instrumental to getting the bed on the legs.
Image

Here is something I added in the earlier stages of this rebuild- an oliver plaque. I am definitely a fan of these things and MJ member Mr Douglas cast this for me eons ago.
Image

I haven't mentioned that this lathe is actually 440 volt 3Ø. It requires a transformer after my phase converter to raise the 220V to 440V. I decided to mount the transformer inside the leg so I do not have to look at it. In order to do this I drilled a hole through the headstock and attached a liquidtite end. This is it from below. Kinda a hard angle to gage.
Image

And here it is on the inside headstock.
Image

Next step is putting the headstock in place. Crown time
Image

The balance is a little off, but it works fine and feels safe
Image

Of course, as soon as I have it in place, I realize I should have used a 45º end fitting for the liquitite fittings. I quickly swap that out.
Image

With the head in place
Image

Next up is the door for the foot. I ordered a thrust bearing and a pair of hardened washers to make it swing smoother. I also made a new hinge pin as the previous one lost a battle to my sawzall on disassembly
Image

In place and it swings very nicely.
Image

That's it for the night. I have much cleaning to do on all of the goodies that were in my packing crate.
Last edited by crzypete on Mon Apr 15, 2013 9:36 pm, edited 1 time in total.
crzypete
Posts: 1691
Joined: Thu Dec 16, 2004 10:45 am
Location: New York State
Contact:

Post by crzypete »

I got to cleaning the tailstock and carriage today. The rust wasn't too bad, but I ended up taking both units completely into pieces so I could clean more efficiently.

I wanted to share one of the previous modifications I made to the lathe. I had a problem where the carriage was "bouncing" a bit as I tried to turn a piece. It turns out that the carriage is secured by a plate in the back, the spur gear which pulls it along the ways, and of course gravity. I decided that a follower in the front would increase the stability. I milled a flat on the back of the apron and turned a cammed follower with bearing that rides under the front of the bed. This photo shows the location in relation to the rest of the apron.
Image

Here's a close-up. The cam action allows it to be brought up the the bed to adjust its tension. It is really just an off center turning. Beyond the hex section is a threaded section that is concentric to the hex. It is held to the apron by an acorn nut on the front.
Image

From the front all you see is a single acorn nut under the cross slide. I remember replacing a number of nuts with acorn nuts on the carriage. Here it is all cleaned up.
Image

Here's the lathe as it stands now. I got the handle back on the door and the tailstock cleaned up as well. The thing on the far right of the lathe is an adapter that sits on the carriage so you can use a hand tool rest with the carriage. Also, not seen but accomplished is the transformer which is now mounted within the leg I ran wires down to it and attached them to its internal lugs. Hopefully, I will wire the rest of the lathe tomorrow.
Image
nektai
Posts: 1019
Joined: Fri Dec 17, 2004 9:34 am
Location: Long Island, NY
Contact:

Post by nektai »

Can you post a picture so we can see where this beast landed in your studio? Thanks!
chathamworkshop

Post by chathamworkshop »

Wow! What a beautiful machine, Pete. It is amazing what a professional restoration will do for piece of aging machinery. The Art Deco look really pops! I would love to have a lathe like that, but do not have the room. Al least we now have yours to drool over. Now you will have to start using it!

Bill
crzypete
Posts: 1691
Joined: Thu Dec 16, 2004 10:45 am
Location: New York State
Contact:

Post by crzypete »

Bill, I'm not sure I have the room! But it is here and I'm not particularly inclined to sell it.

As to the look, It's not my favorite Oliver machine. I feel like the lines and detailing are a bit disjointed. But hey, I like the function. I am thinking about blocking it a bit higher. Perhaps turning it into a 20" That would really make the inboard capacity luxurious.

Nektai, shop pics- one of these days. I'm still trying to get that area reorganized. The lathe is way too big!

Pete
DumDum
Posts: 30
Joined: Tue Aug 12, 2008 10:54 pm
Location: Topsham, Maine

Post by DumDum »

oh man, that thing is cherry. I'm looking forward to stripping and bondo'ing all of my machines when my elusive barn finally gets built.
Post Reply